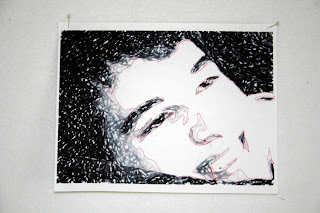
Quilting Arts has a television show that runs every Saturday on one of our local PBS stations. One of the techniques shown was an easy method of creating fabric portraits. This technique was also published in the Quilting Arts book. The steps are fairly easy and the result, at least in my case, was a cool abstract.
Step 1: Take or find a photo of a favorite subject. Mine is my teen aged son, Nick. Photography note: I got him to smile by telling him not to smile. I took a closeup. In the QA book, they use a larger photo and crop it down to a postcard sized photo, 4 inches by 6 inches. I chose to work in the larger 8 by 11 format.
Step 2: Upload the photo to your computer and, using your favorite photo editor (mine is Microsoft Digital Image Pro), change the photo to black and white. Digital Image Pro also has fun effects you can use to alter your photo. I've used this before to create a quilt of me during my blonde days inspired by Andy Warhol that I called Fifteen Minutes of Fame.
For Nick's portrait, I tried the film effect, which was cool but settled on the charcoal effect.
Step 3: Find 3 - 4 gradations of gray scale for the photo and trace around the areas.

Step 4: Mirror image your photo. This may seem unnecessary. I thought so and didn't do it. Big mistake. Later on, when putting the fabrics together, your image will be backwards and it will be MUCH more difficult to follow your pattern. Learn from my mistake and you'll avoid the headache.
Step 5: Find 3 - 4 fabrics (depending upon the number of gradations you chose) and adhere them to a fusible paper-backed product such as steam-a-seam 2. Here's where I got to use a neat new product. You can now buy fusible sheets that can be fed into your ink jet printer. This means that you no longer have to copy your image to the paper by hand - the computer does it for you! I love this stuff. It will be on my Christmas and birthday list from now on.
Step 6: Another mistake I made that you can learn from - Choose your darkest fabric and just use it as the background. Don't bother cutting it up. Otherwise, you have to be sure to always cut exactly so that pieces fit. In the QA book, they only use one sheet of steam-a-seam and, after copying the image onto the paper, cut out the pieces and adhere them to the different fabrics. This ensures that all of your pieces fit together, wastes less fabric and is the better way to do it. If and when I do this again (because it really is kind of cool and quick), I will follow their lead. Besides, it uses less sheets of the cool new printer-friendly fusible.
Step 7: Cut out your fabric pieces, lay them onto your base fabric, using your original as a guide. When it looks good, press it in place and voila!


No comments:
Post a Comment